
Pictures of days that you go fishing, hunting, camping or hiking are treasures that grow in value with each viewing. Trouble is that many folks do not know how to make the best of it.
Here are a few notes and examples of both poorly shot and properly taken photos. Are the better ones more valuable? Well, no, but they are surely more viewable. If the photo quality and positioning causes you to ask, “Who’s that in the picture?” Well, you probably could have done better.
Ok, here we go.
GET CLOSER. I doubt the photo is a landscape shot. Virtually it’s a photo of a person or persons, so, get close to the subject.
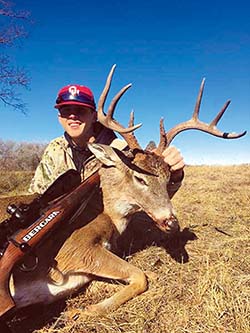
Great deer photo but who is the hunter?
The hunter’s face should not be covered in shadow. Use the sun or some type of reflector or simply remove or move your cap or hat back on your head to reveal the face. Your face should be centered in the top half of the photo and the bottom of the picture should stop at your belt line. It’s rarely useful for the photo to show your feet, so the bottom is the belt line, center of the top half is the face.
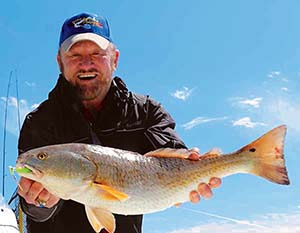
Tip: Make sure the face isn’t hidden by shadows.
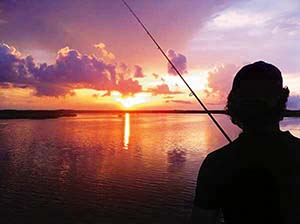
Tip: A sunset or sunrise shot should have a person in it.Sunrises and sunsets are great topics and it’s hard to go wrong. The thing you should do is put a recognizable shape of someone in the photo. Make it a silhouette if you like, just get a person in there. Put the silhouette in a corner with the sunrise or sunset in the center of the top half.
I can’t say I’m an expert at this photography thing at all. Maybe 10 percent of my photos are shot correctly, but we can all do better. I’ve included a few examples in this effort. Good luck with these “shots.”
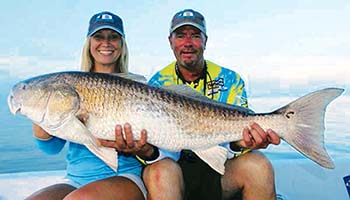
This is what O’Neill considers a perfect photo.
Photos: courtesy of O’Neill Williams